Guide: Plugin Obsidian pour exporter une note vers Strapi
Publié le - 4 avril 2024 par Andy Cinquin
Plugin ObsidianStrapiExport de notesConfiguration pas à pasObsidianAPI StrapiOpenAIExportation de contenu
Plugin Obsidian pour exporter une note vers Strapi
Dans cet article nous allons voir ensemble, étape par étape comment utiliser mon Plugin Obsidian dans Strapi.
Les éléments requis sont :
- Un élément que vous voulez publier, écrit dans votre Vault Obsidian
- Une API en ligne, et disponible.
- Accès à distance et depuis internet à votre API possible (en local ça ne fonctionnera pas !)
- Une clé OpenAI.
Tuto
Je vais faire avec vous, lorsque je crée cet article, la configuration de ce plugin.
Première étape, on installe le plugin :
🚀 Strapi Exporter: Supercharge Your Obsidian-to-Strapi Workflow, export an obsidian notes directly to your Strapi API
Première étape, on installe le plugin :
🚀 Strapi Exporter: Supercharge Your Obsidian-to-Strapi Workflow, export an obsidian notes directly to your Strapi API
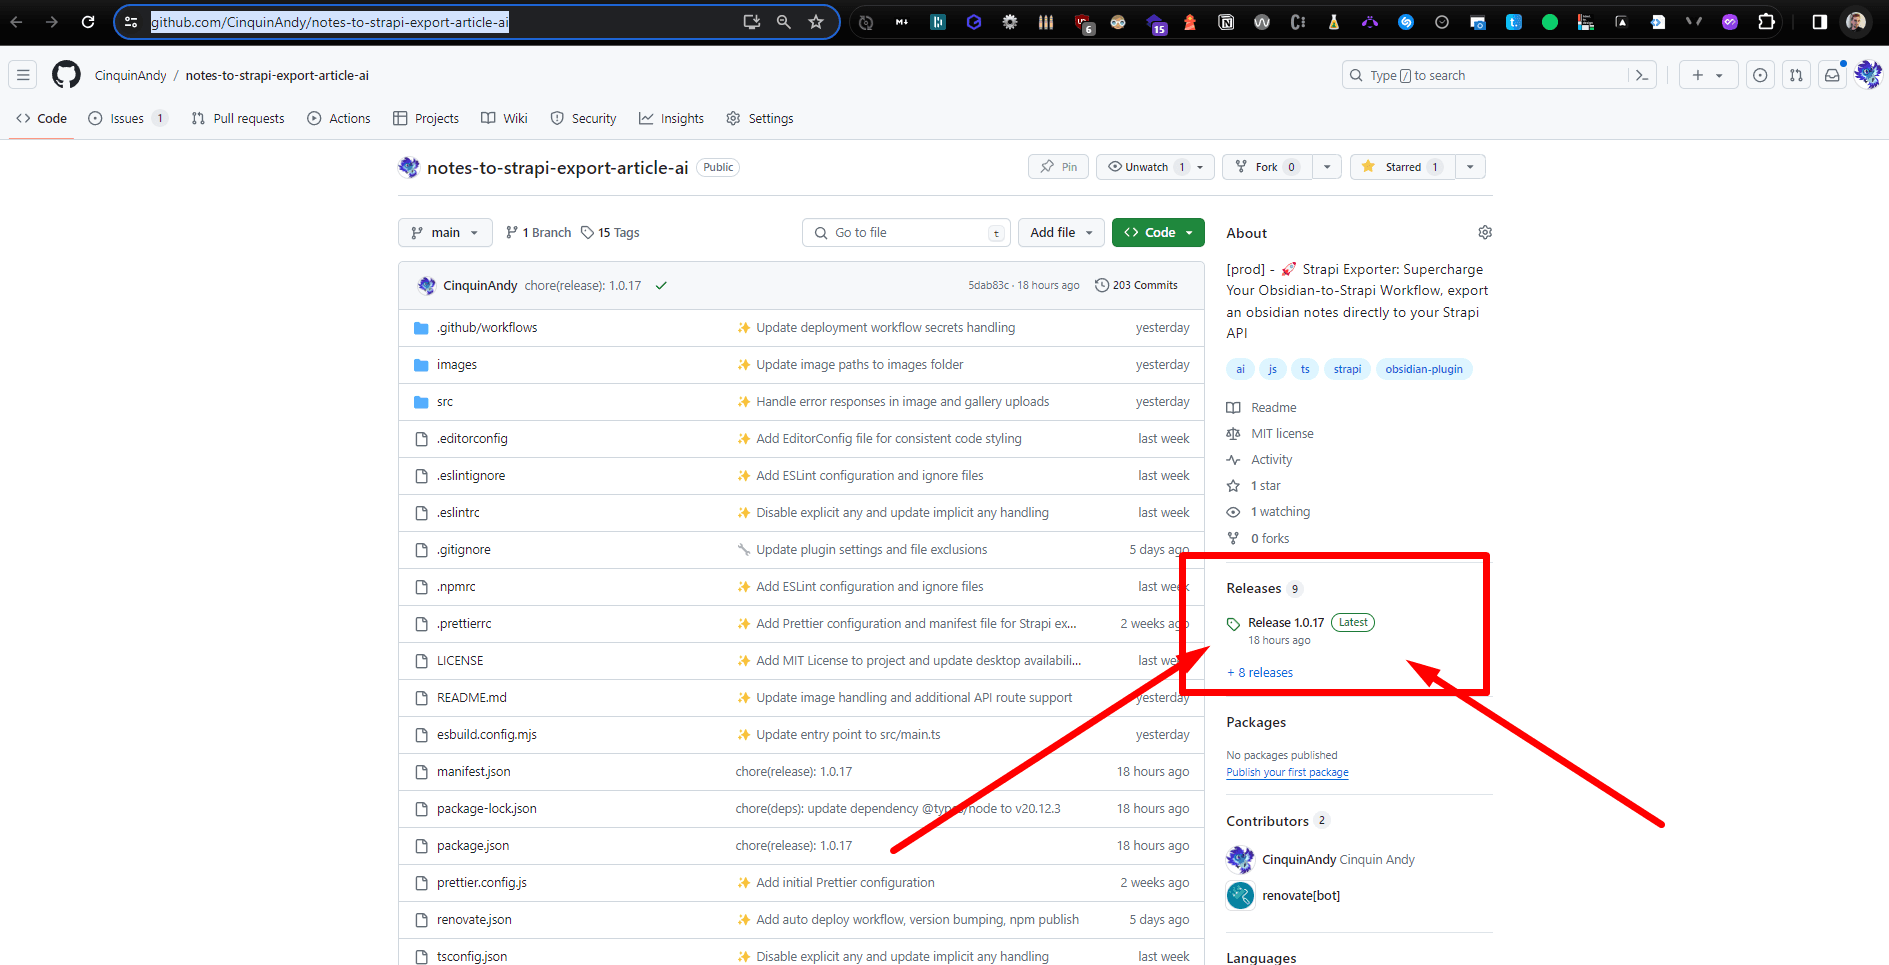
On va dans release
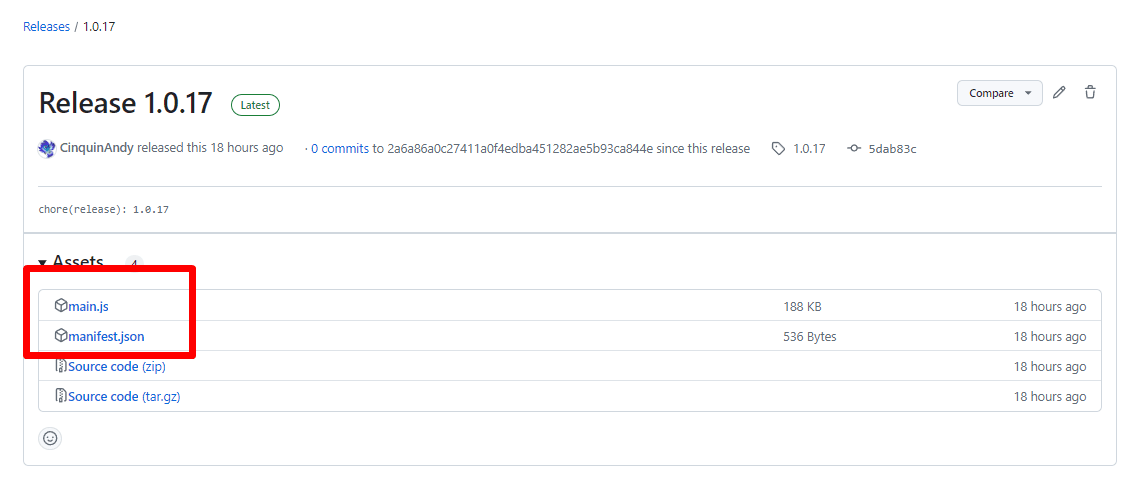
On télécharge le main.js & le manifest.js, de la dernière version disponible.
On va ensuite à la racine de notre Obsidian (pour moi c'est
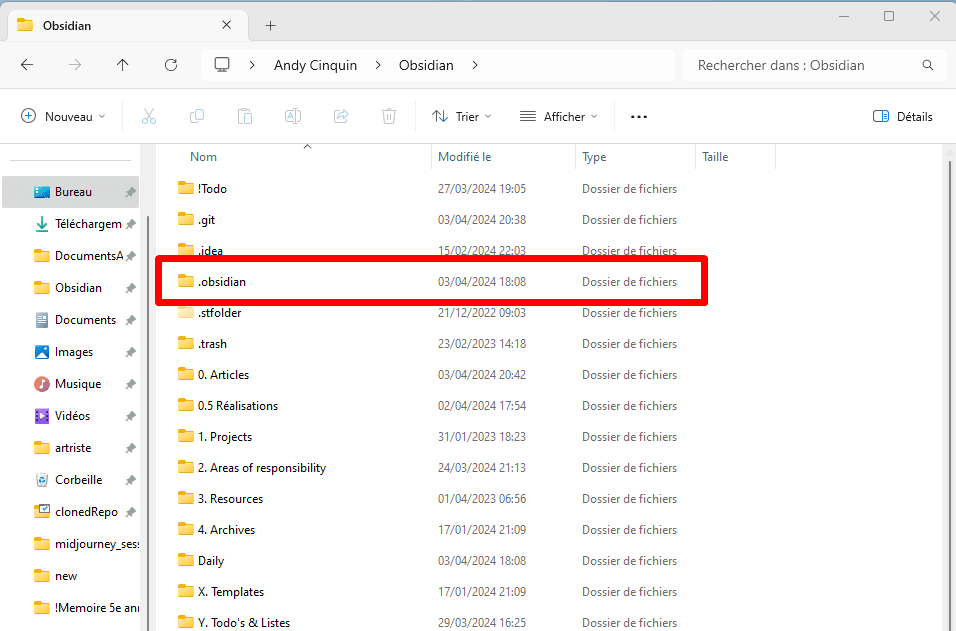
C:\Users\andyq\Obsidian)On va dans le .obsidian
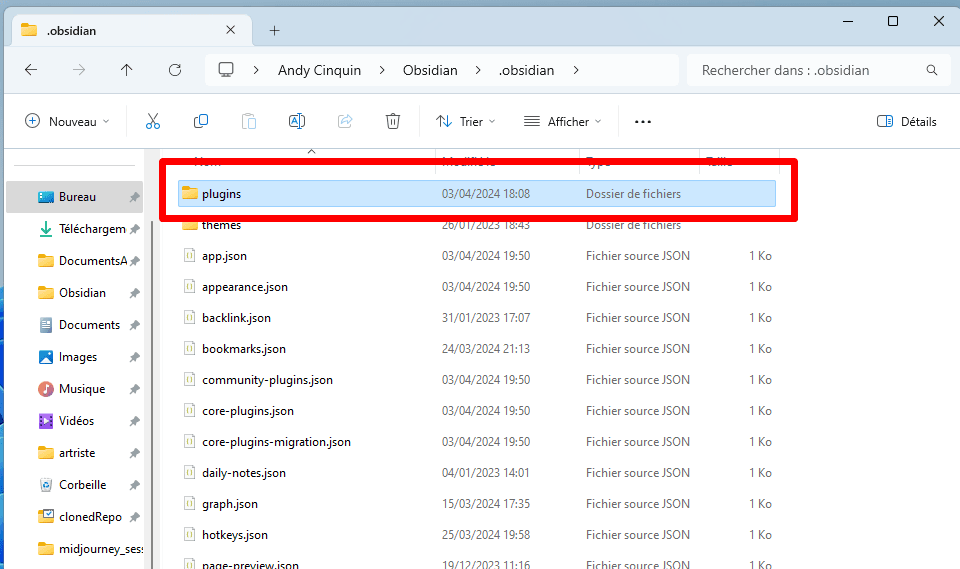
Puis dans plugins
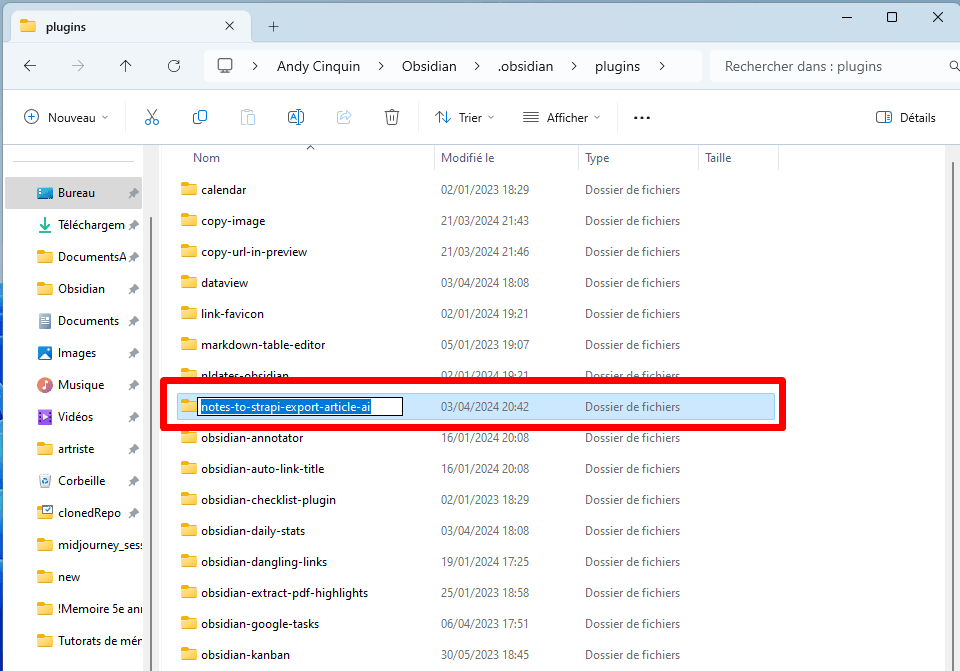
Et on crée un nouveau dossier "
notes-to-strapi-export-article-ai".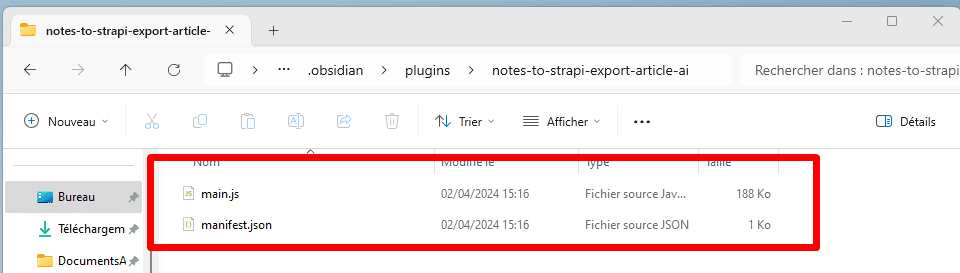
Et on met nos deux fichiers précédemment téléchargés ici.
Ensuite on ouvre notre Vault Obsidian et on passe par les paramètres
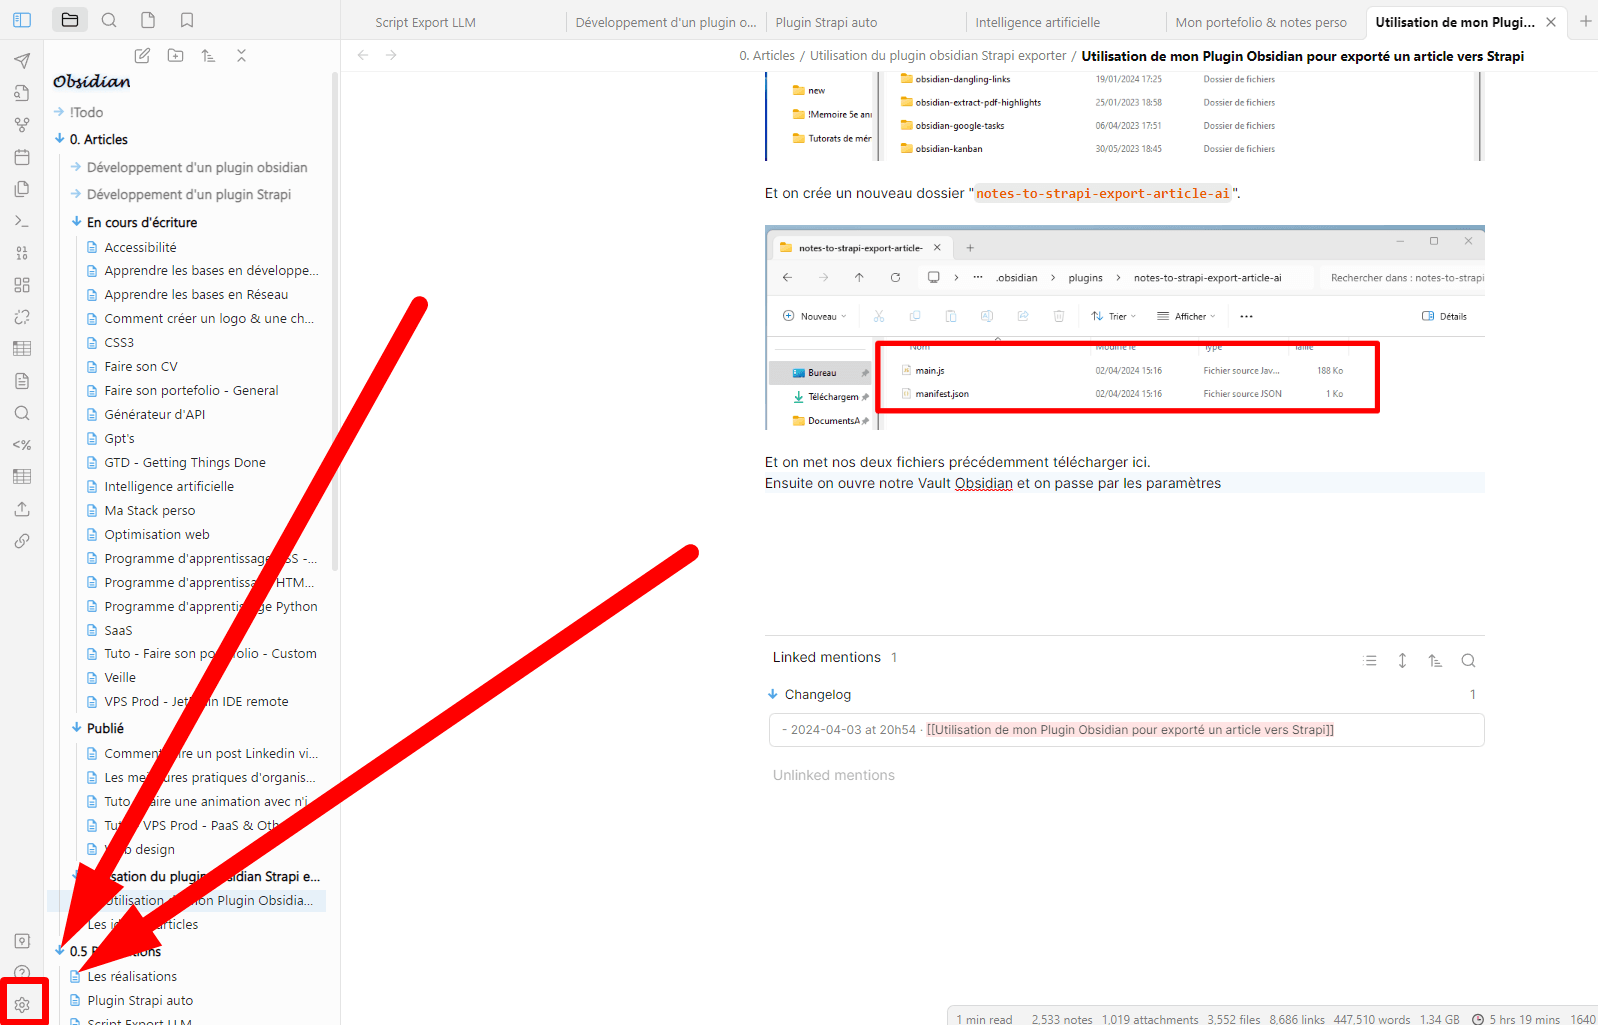
Ensuite on ouvre notre Vault Obsidian et on passe par les paramètres
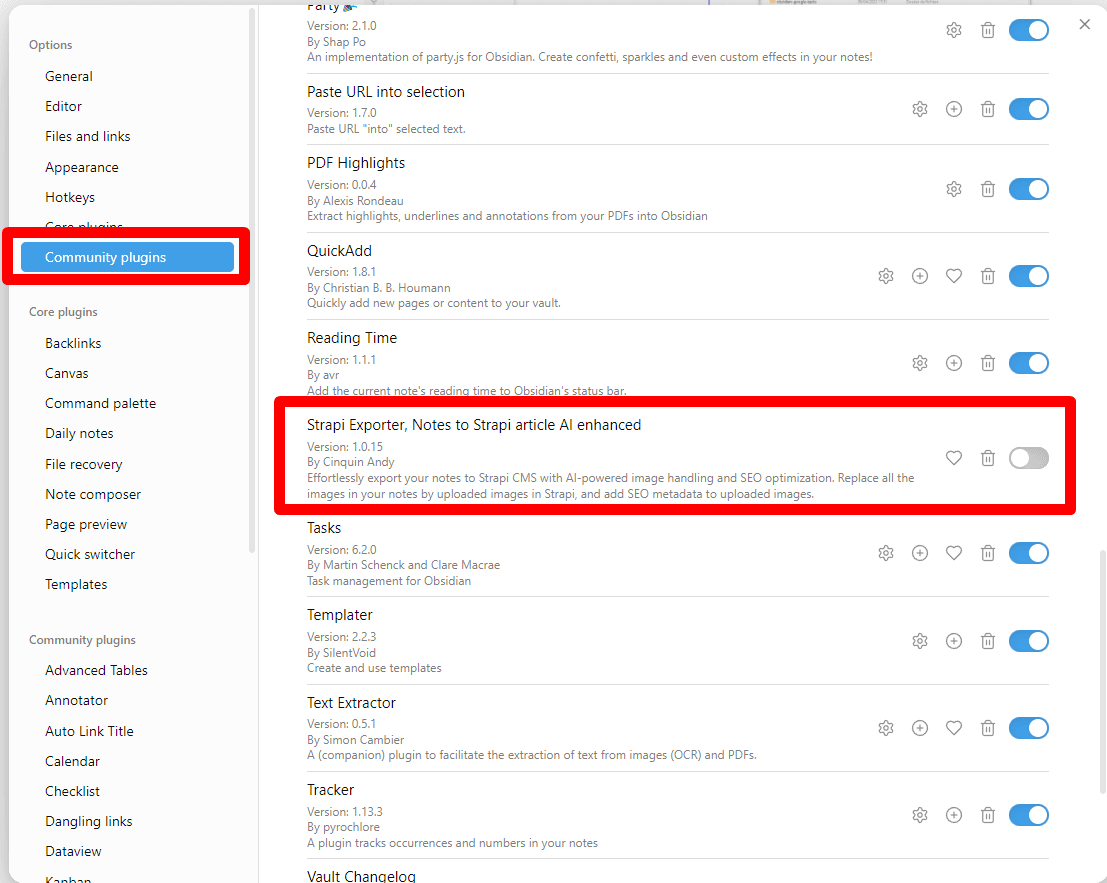
On active le plugin, puis on passe sur la partie configuration.
Configuration
On va donc maintenant passer aux configurations
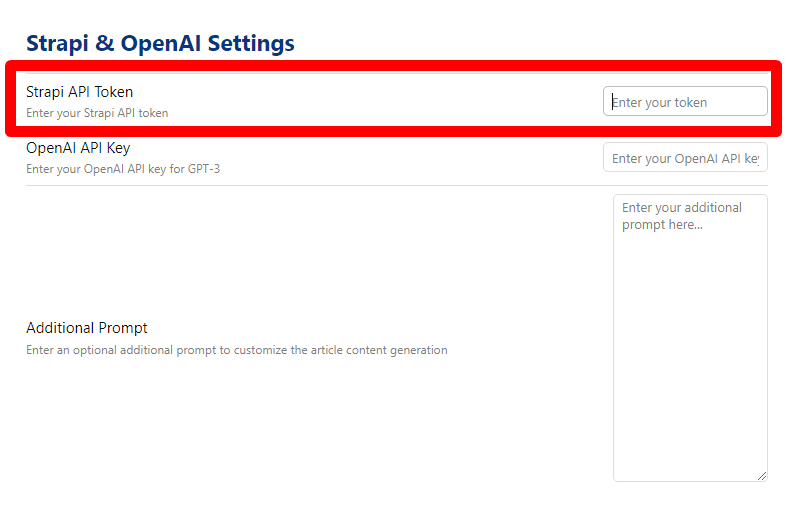
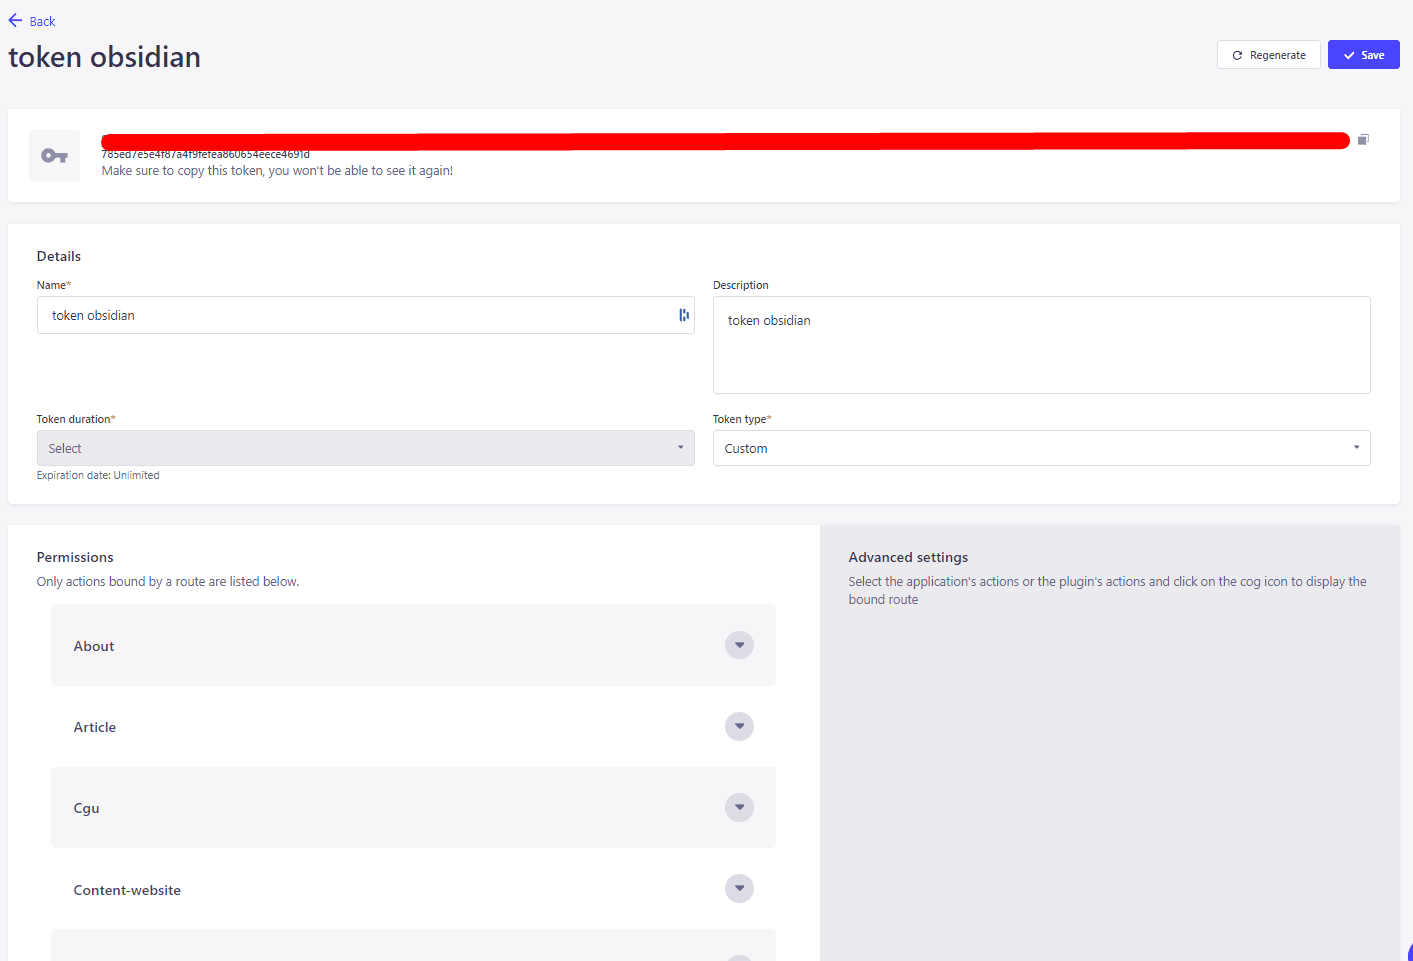
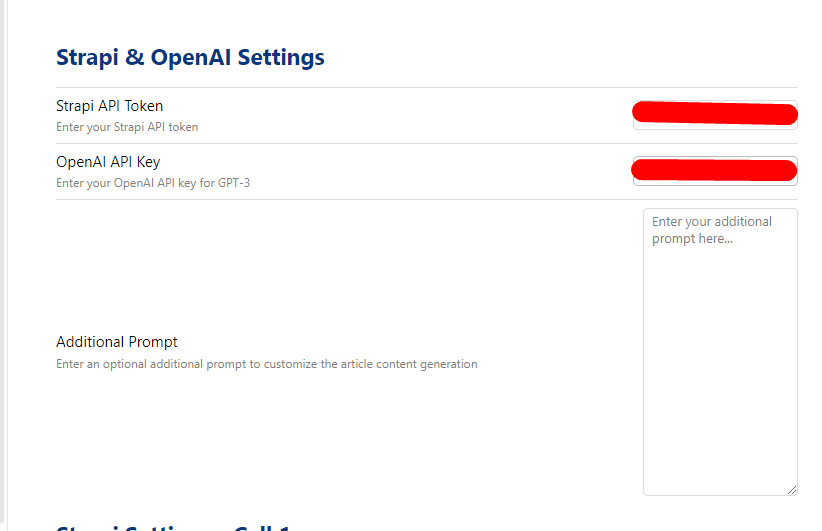
Strapi API Token
On va commencer par le token Strapi.
On va sur l'API Strapi. Dans settings, API Token, et on crée un Token
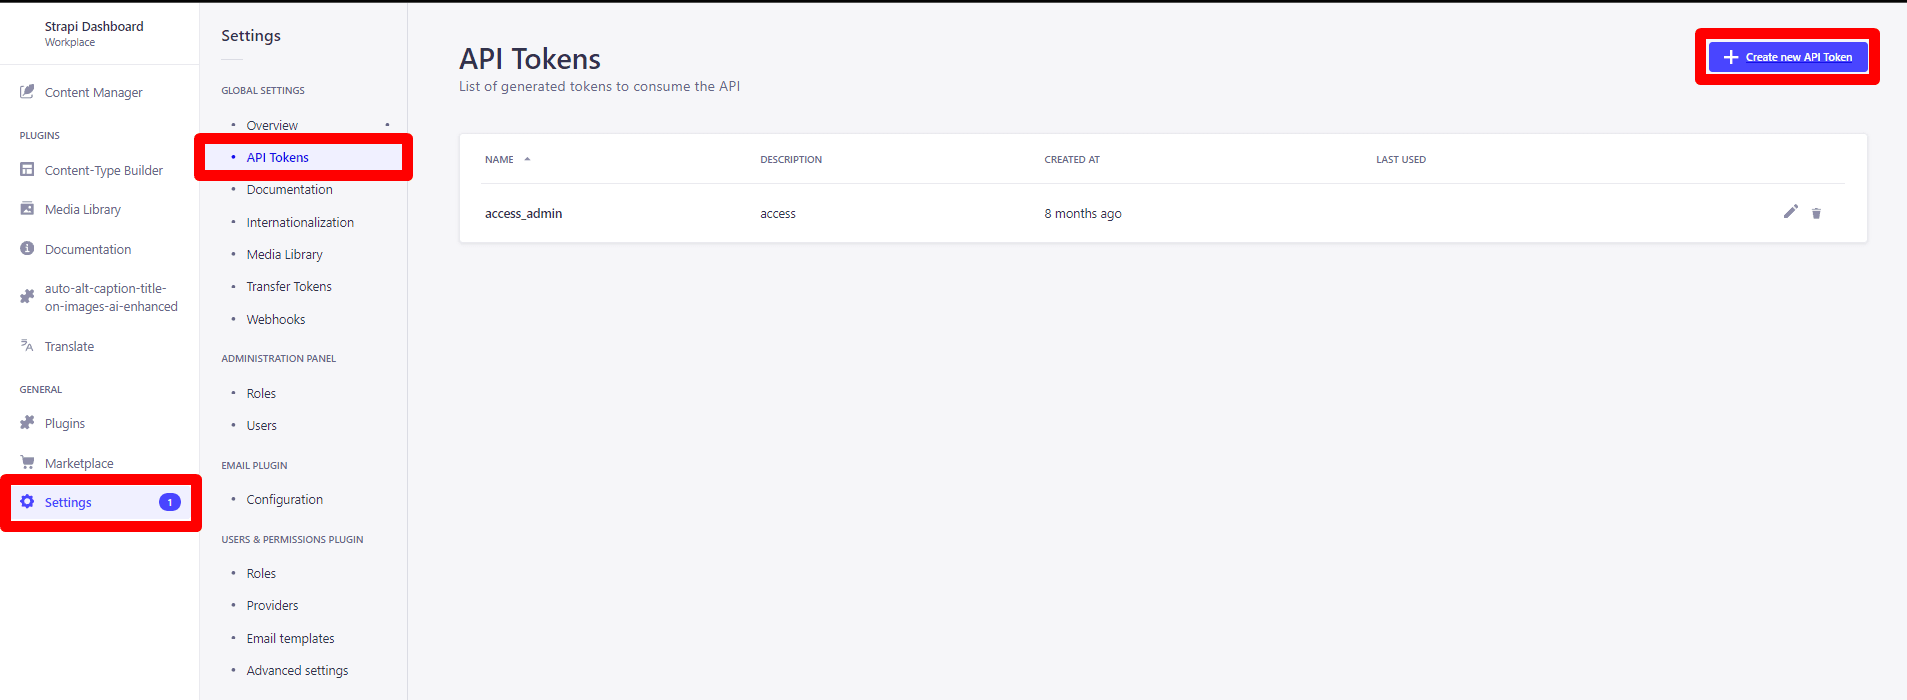
On va sur l'API Strapi. Dans settings, API Token, et on crée un Token
Simple
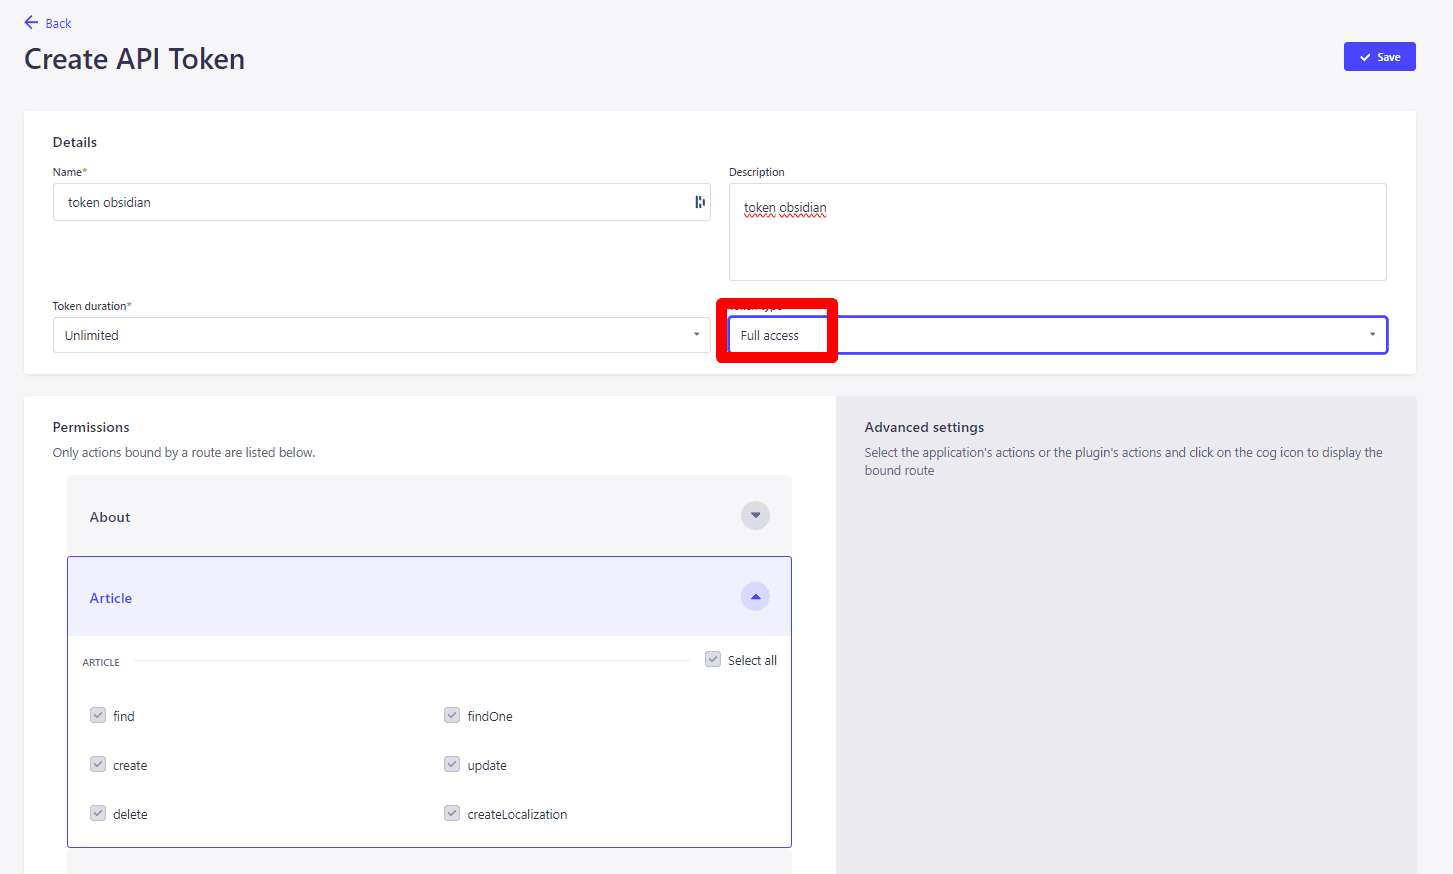
En full access, comme ça, pas de soucis de droit
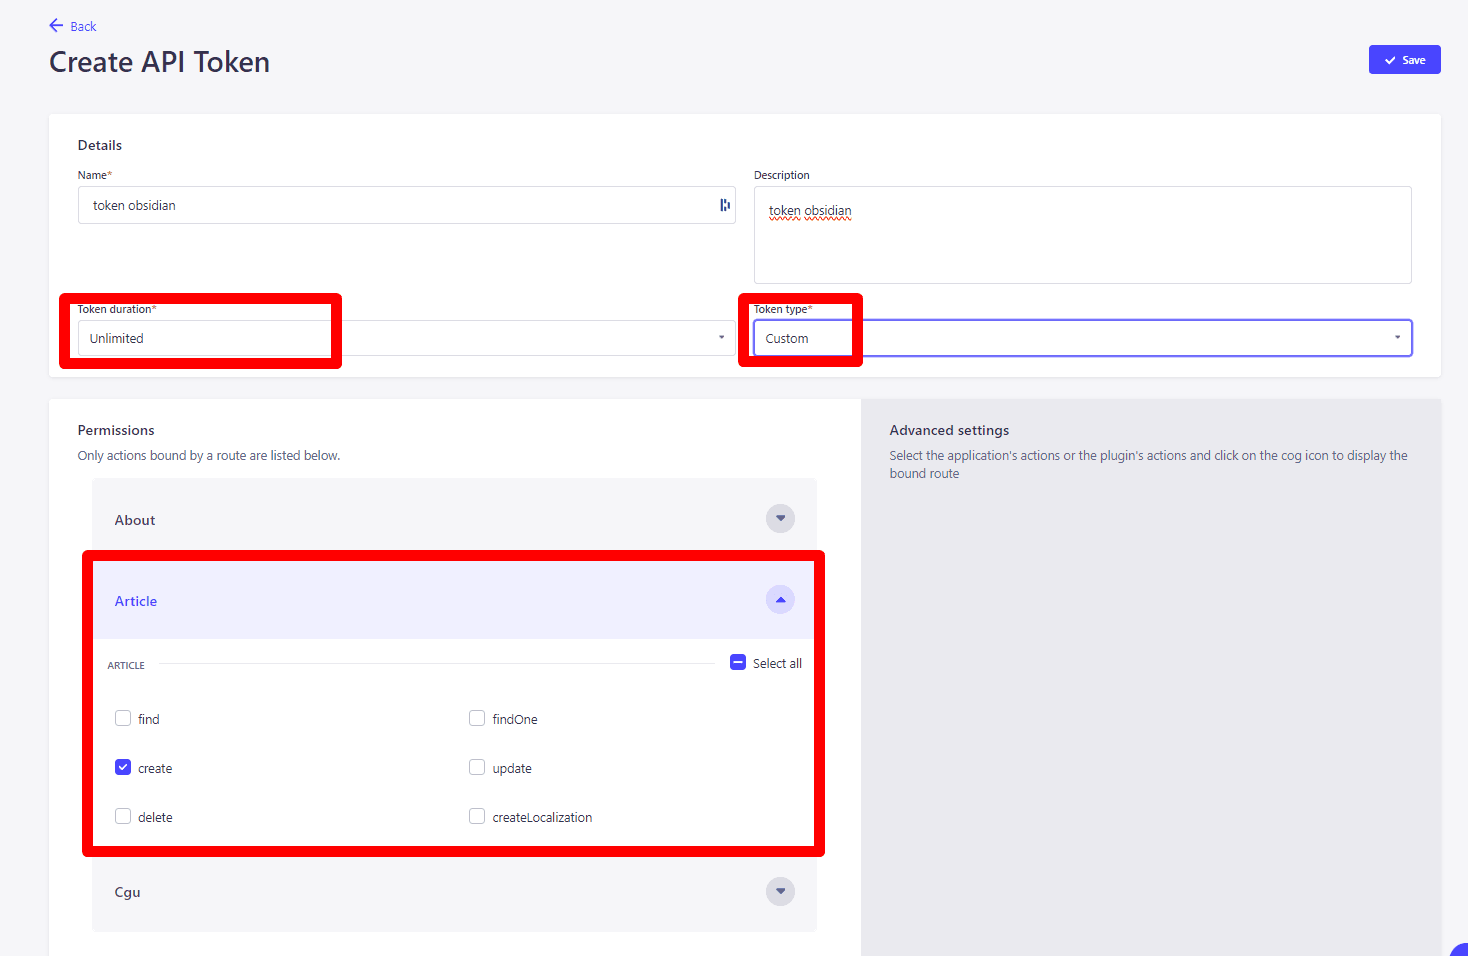
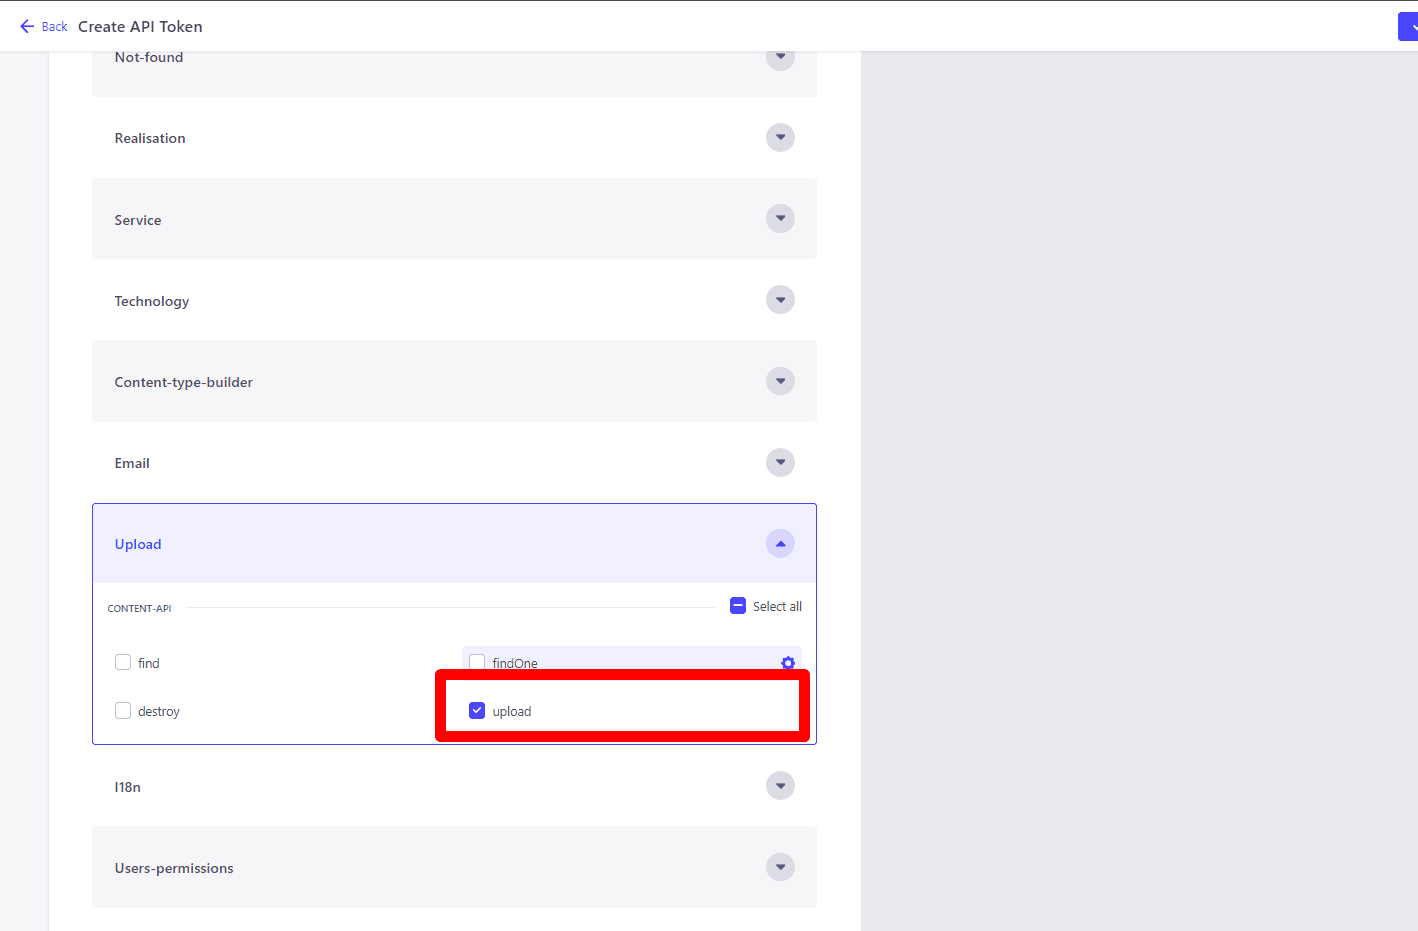
Avancée (optionnel)
Avec les droits strictement nécessaires pour créer un article, il est nécessaire également, d'avoir les droits d'upload d'images.
On prend le Token Obsidian généré, et on le met dans notre config :
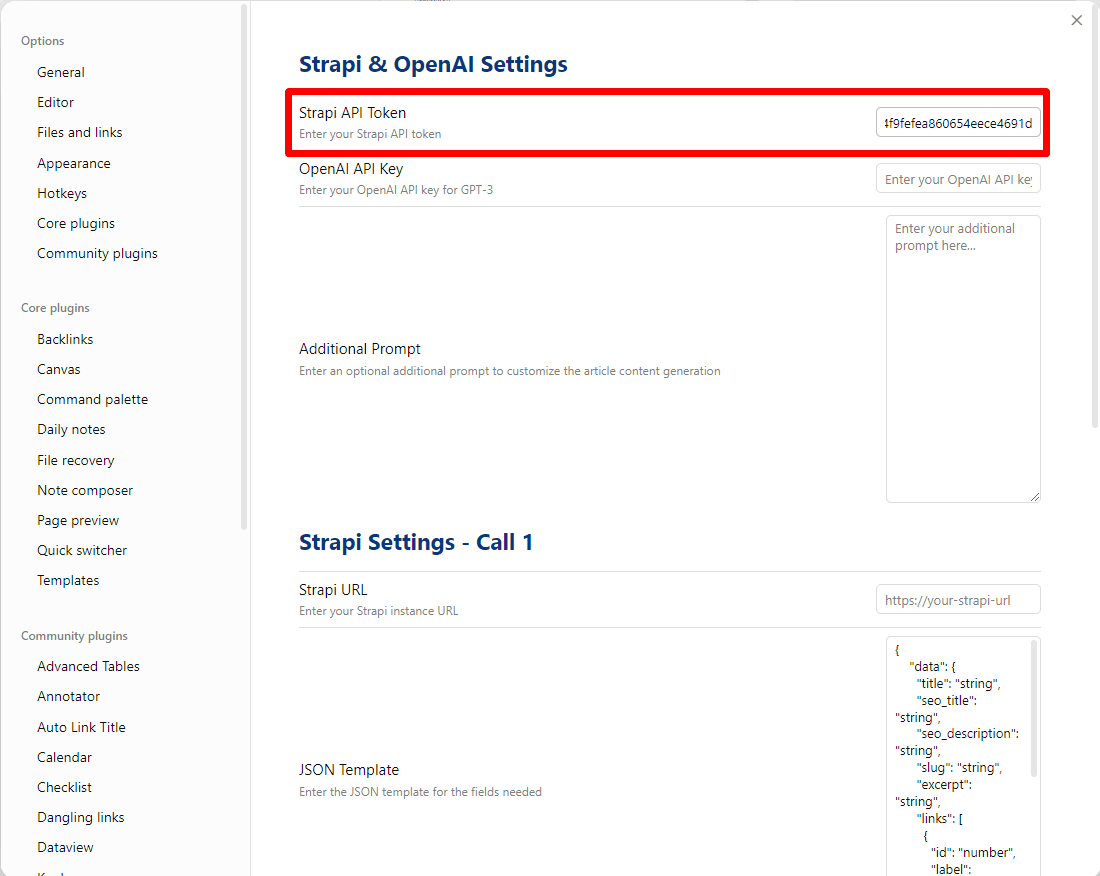
Open AI Settings
OpenAI Platform
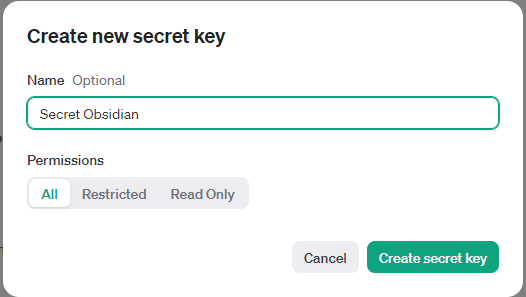
On va chercher un secret dans la config d'OpenAI.
On va chercher un secret dans la config d'OpenAI.

On crée notre secret ici,
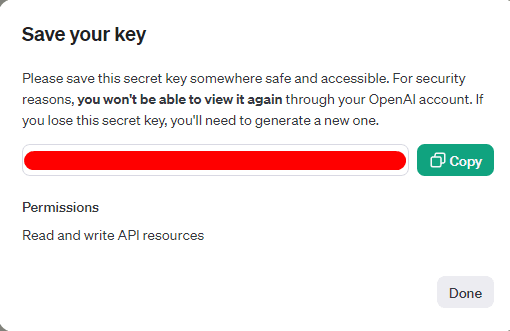
On met notre clé ici
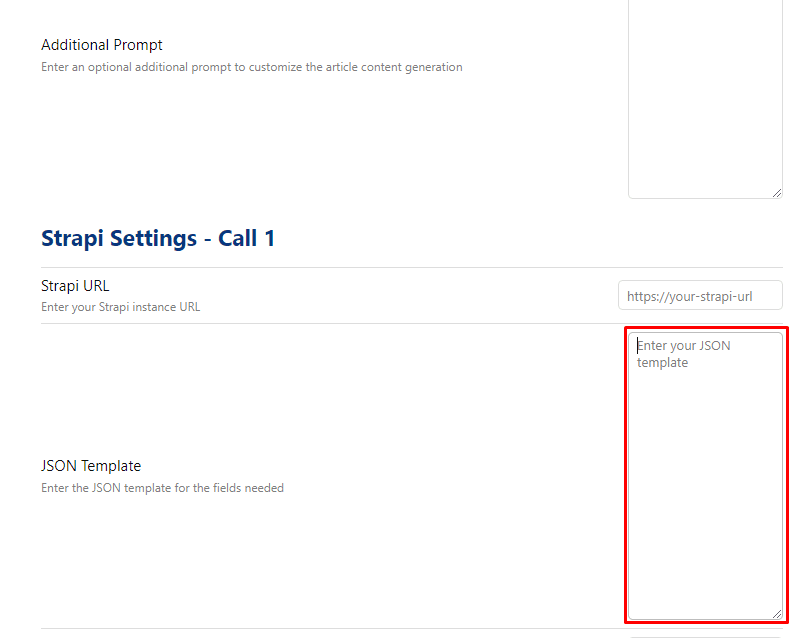
Additional prompt
On complète avec un prompt additionnel si besoin, pour spécifier des informations supplémentaires, ici, on est libre, on donnera des infos en plus à ChatGPT pour avoir de meilleurs résultats.
Par exemple, moi dans ma config j'ai mis ça :
Par exemple, moi dans ma config j'ai mis ça :
If present, the locale needs to be 'fr' and the content in French, and generate at least 8 tags if present in the schema too. If present, the rank needs to be 999.
Meta Description: Write an attractive meta description including the main keyword, which encourages clicking on the article from the search results.
Optimization for Readers and Search Engines: Write content that is not only optimized for search engines but also engaging and informative for readers. The content must answer their questions or solve a problem.
Strapi settings - call 1
Strapi URL ( call 1 )
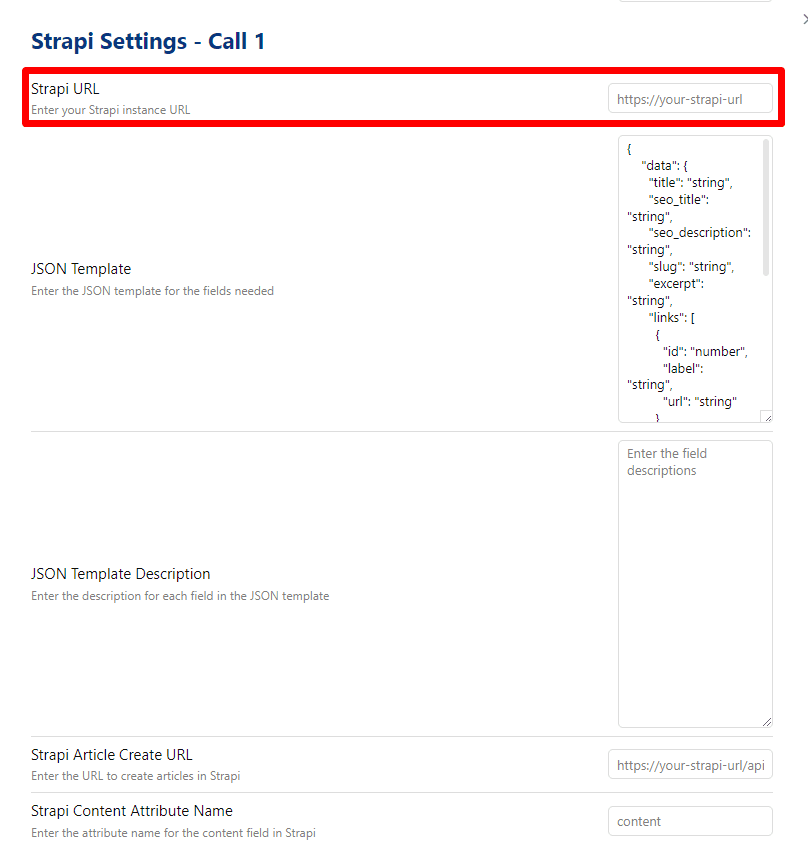
On va maintenant configurer le premier call ( celui qui va venir créer nos articles par exemple )
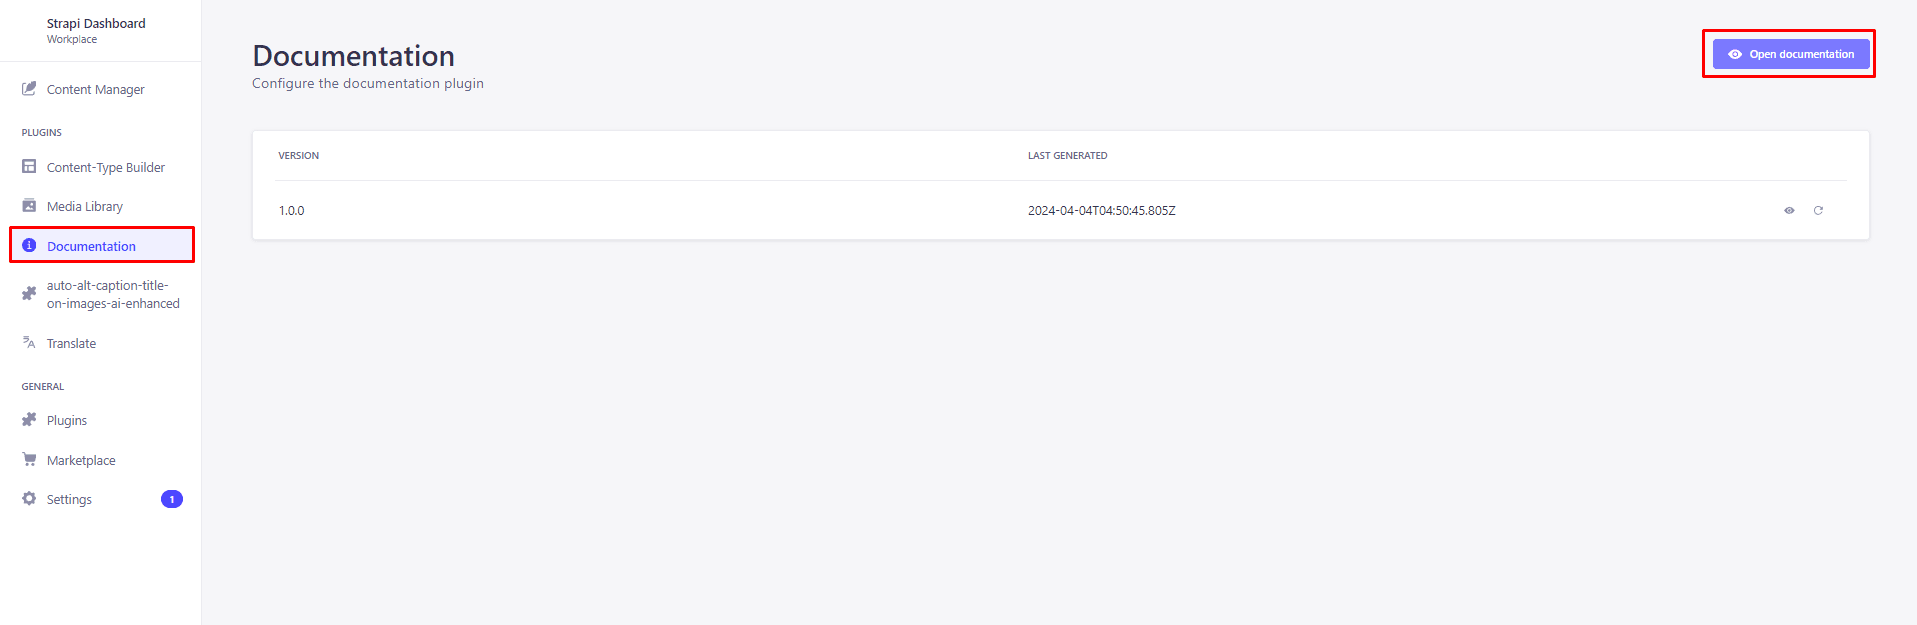
Pour ce faire, on va dans documentation, puis Open Documentation
On récupère l'URL générale de notre Strapi, ici pour moi c'est :
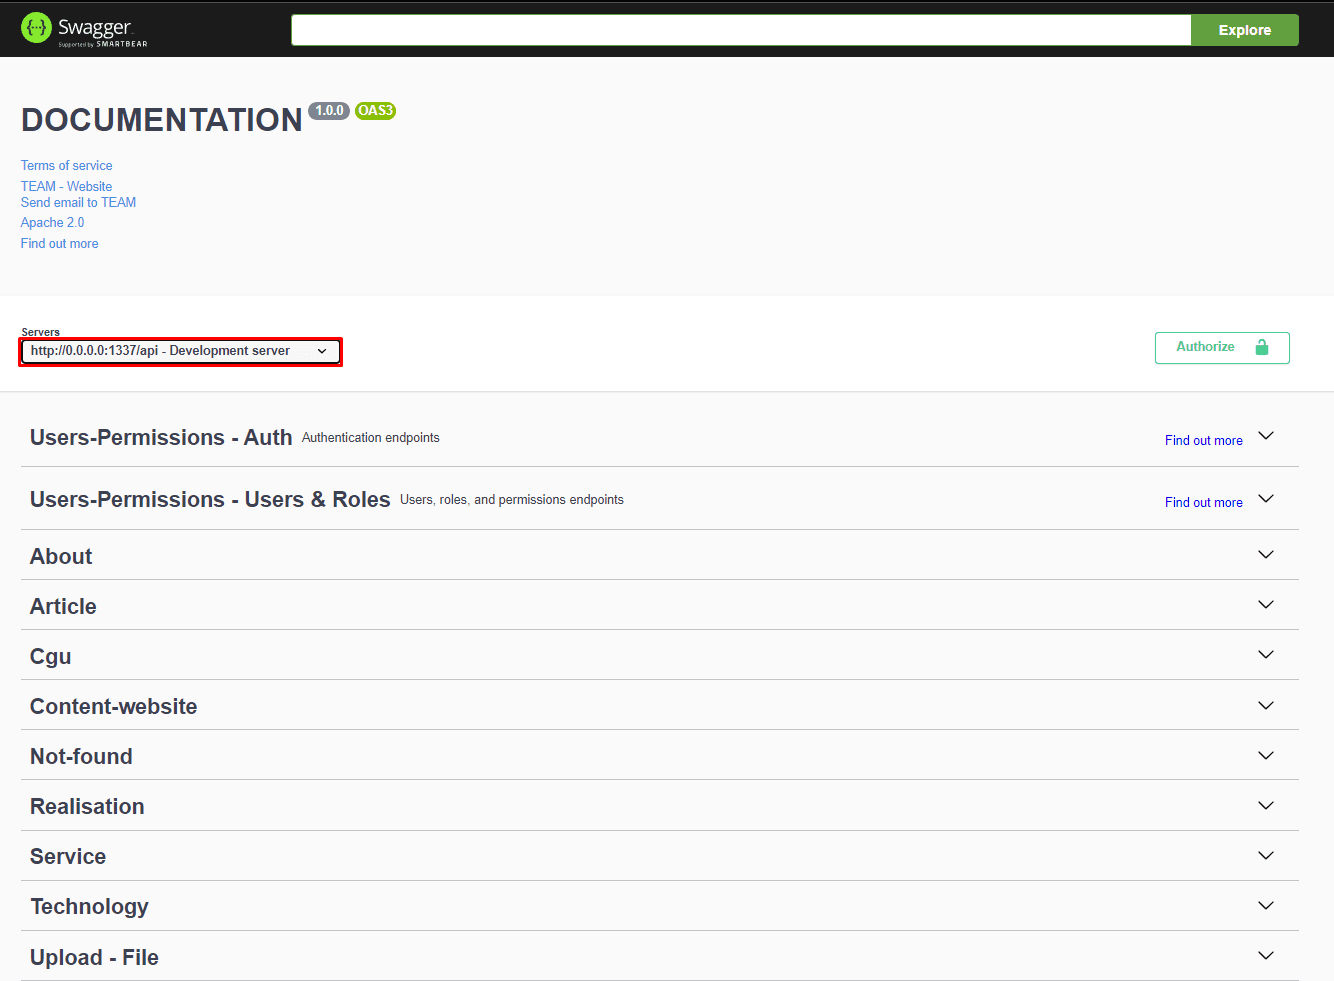
Et on remplace l'adresse locale affichée, par l'adresse distante, pour moi, ça donne donc
Et on remplace l'adresse locale affichée, par l'adresse distante, pour moi, ça donne donc
https://api.andy-cinquin.frJson template config
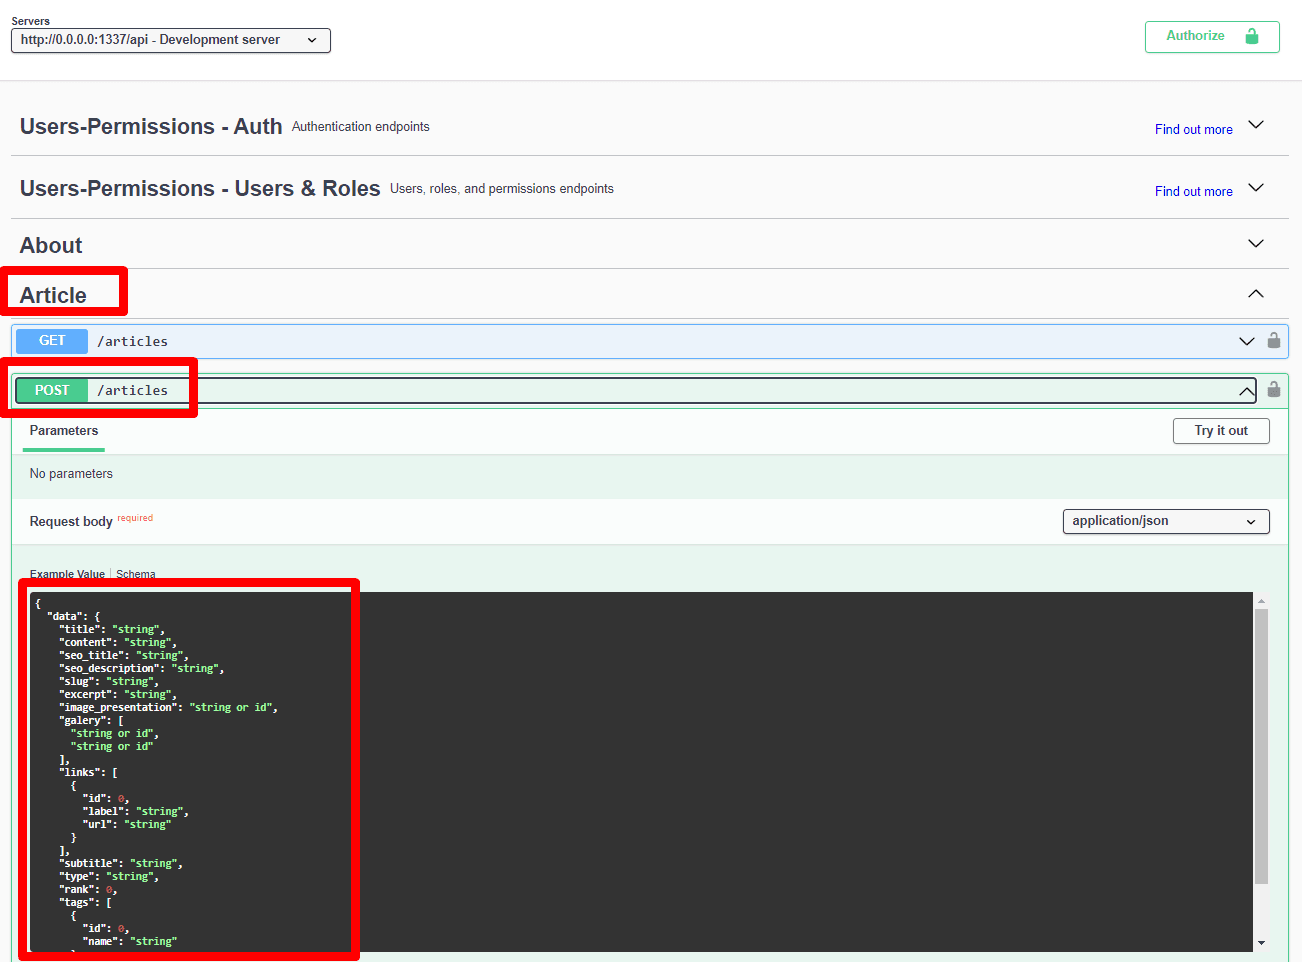
Et on récupère dans notre swagger côté Strapi, le schéma de données que nous devons envoyer.
On supprime les liens vers d'autres tables en cascades (désolé ! ce n'est pas encore implémenté !)
Et on supprime la partie "content" (la partie qui correspondra au contenu principal de votre article / réalisation ), ainsi que les images pour le moment.
Ce qui donne pour moi :
{
    "data": {
      "title": "string",
      "seo_title": "string",
      "seo_description": "string",
      "slug": "string",
      "excerpt": "string",
      "links": [
        {
          "id": "number",
          "label": "string",
          "url": "string"
        }
      ],
      "subtitle": "string",
      "type": "string",
      "rank": "number",
      "tags": [
        {
          "id": "number",
          "name": "string"
        }
      ],
      "locale": "string"
    }
  }
Json template config description
Ensuite, on va configurer la suite de notre plugin avec la partie "description"
On reprend le même template, mais on décrit ce à quoi nos données doivent ressembler, on donne des détails et des indications. En langage naturel (gestion par un LLM, incroyable non ?)
On reprend le même template, mais on décrit ce à quoi nos données doivent ressembler, on donne des détails et des indications. En langage naturel (gestion par un LLM, incroyable non ?)
{
    "data": {
      "title": "Title of the item, as a short string",
      "seo_title": "SEO optimized title, as a short string",
      "seo_description": "SEO optimized description, as a short string",
      "slug": "URL-friendly string derived from the title",
      "excerpt": "A short preview or snippet from the content",
      "links": "Array of related links with ID, label, and URL",
      "subtitle": "Subtitle or secondary title, as a short string",
      "type": "Category or type of the item, as a short string",
      "rank": "Numerical ranking or order priority, as a number",
      "tags": "Array of associated tags with ID and name",
      "locale": "Locale or language code, as a short string"
    }
  }
Ça donne ça pour moi !
Strapi create url

Ça c'est l'url complète vers la création d'un article ou réalisation, pour moi c'est
https://api.andy-cinquin.fr/api/articlesStrapi content attribute name call
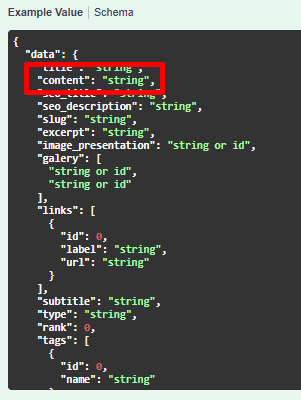
Pour moi le contenu principal de mon article se retrouve ici, j'indique juste le nom de ce champ ici (je fais ça pour économiser des tokens dans les calls API vers OpenAI !)
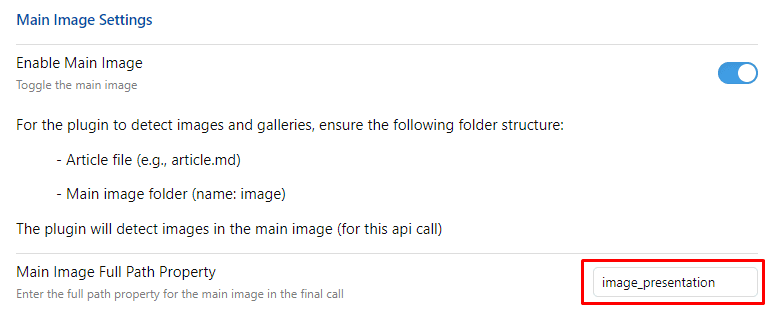
Optional (image)

Pour le coup, cet élément est optionnel, si vous avez une image, par exemple un fond, ou une illustration à ajouter en même temps à votre API et que vous voulez faire tout en même temps, c'est une bonne méthode.
Pour pouvoir être utilisé, il faut avoir un dossier dans votre Obsidian qui se nomme "image"

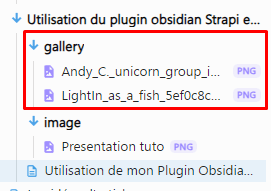
L'architecture doit ressembler à ça pour pouvoir utiliser une image unique
L'architecture doit ressembler à ça pour pouvoir utiliser une image unique
Optional (gallery)
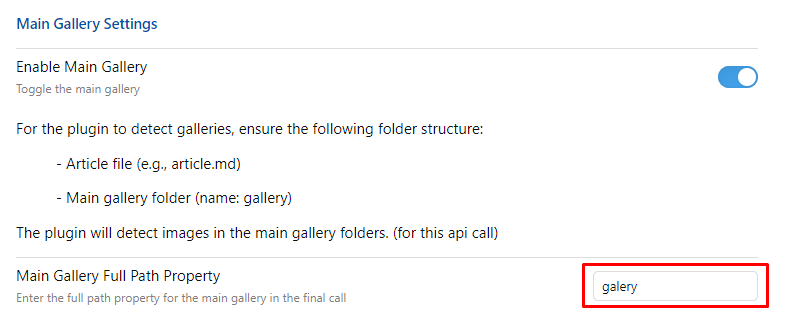
Même système que pour les images, mais avec "gallery".
Configuration call 2 ( optionnel )
Vous pouvez de la même façon, configurer une seconde route, de la même façon
-> Vous devrez redémarrer votre application lorsque vous activez votre seconde route !
Utilisation de l'application
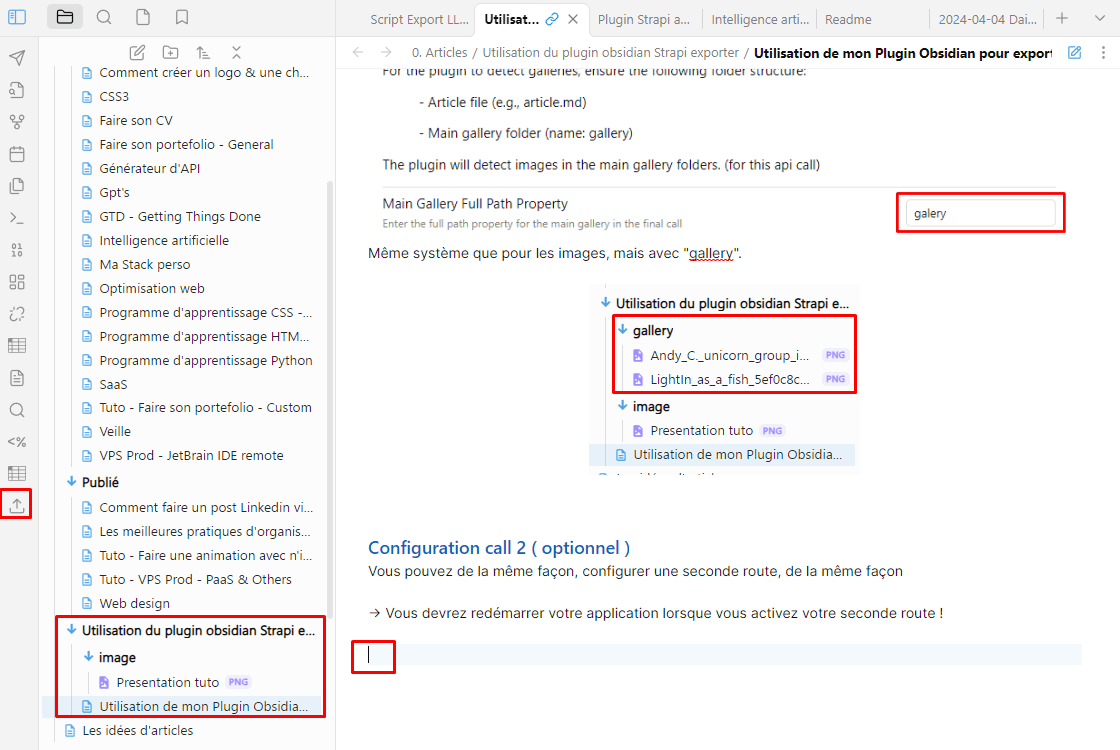
Une fois que tout ça est configuré, il suffit de cliquer sur le petit icône d'upload à gauche dans la sidebar pour upload l'article lui-même
Et voilà, laissez faire la magie !
🚀 Merci d'avoir lu jusqu'ici !
Si cet article vous a plu, partagez-le autour de vous.
💡 Une idée en tête ? Discutons-en !☕